TL;DR:
- Building a custom sportswear kit requires careful planning, from gathering branding assets to choosing appropriate fabrics and printing methods. Accurate size collection and well-managed production timelines are crucial to avoid delays and errors. Clear communication and a structured process ensure durable, professional-quality uniforms that meet team and league requirements.
Getting the process right when you want to build a custom sportswear kit for your team is harder than most coaches expect. Design accuracy, sizing headaches, and tight seasonal deadlines can all derail an order before it even reaches production. Add Australia's intense UV conditions into the mix, and choosing the right apparel becomes a genuine performance decision, not just an aesthetic one. This guide walks you through every stage of the process, from gathering your branding assets and selecting the best materials for sports uniforms, through to printing methods, sizing collection, and delivery management. You will leave with a clear, repeatable framework your team can rely on season after season.
Table of Contents
- Key takeaways
- Prerequisites before you start designing
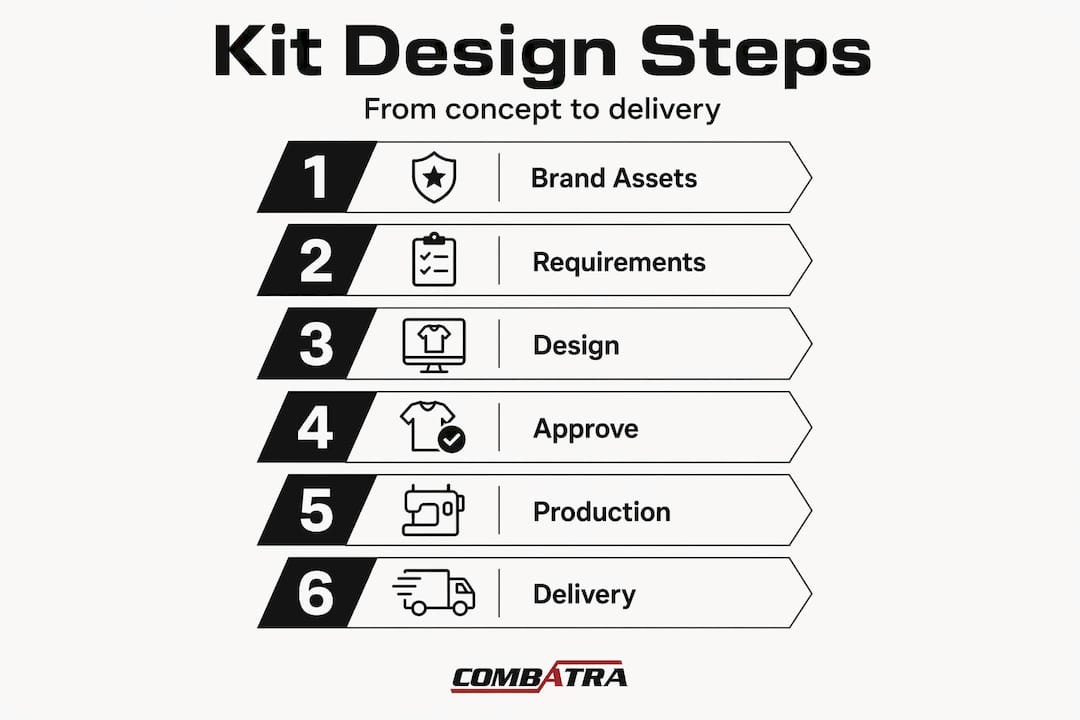
- Designing your custom sportswear kit step by step
- Printing and decoration methods compared
- Collecting accurate sizes from your team
- Managing production timelines and delivery
- My take on what actually makes or breaks a custom kit
- Build your team's kit with Combatra
- FAQ
Key takeaways
| Point | Details |
|---|---|
| Start with brand assets | Gather vector logos and confirmed team colours before any design work begins. |
| Choose fabric for your sport | Match fabric weight, stretch, and UV rating to the sport and Australian climate conditions. |
| Select the right print method | Sublimation suits full-colour polyester kits; screen printing suits simple designs on cotton blends. |
| Collect sizes systematically | Use a digital form with a firm deadline to reduce errors and costly last-minute changes. |
| Order at least six weeks early | Allow production and shipping time so you avoid rush surcharges and missed season starts. |
Prerequisites before you start designing
Before you open a design brief or contact a manufacturer, there is foundational groundwork to complete. Skipping these steps is the most common reason custom kit projects run over budget and over time.
Gather your branding assets first. Your team's logo needs to be supplied as a vector file (.AI or .EPS format) or as a high-resolution PNG at a minimum of 300 DPI. Low-resolution logos force manufacturers to recreate artwork from scratch, which delays proofs by two to three business days. Confirm your official team colours using Pantone or hex codes rather than relying on printed samples or screen grabs, which shift under different lighting.
Understand your league or governing body requirements. Many competitions have strict rules about logo placement, colour contrast for numbers, and minimum font sizes. Check with your association before finalising any design to avoid a costly reprint.
Set a realistic budget and timeline. Minimum order quantities commonly start at six pieces, and ordering below that threshold either limits your options or raises the per-unit price significantly. Budget for both production and freight, and factor in a contingency of around ten per cent for revisions or late additions.
Choose your base garments based on sport, climate, and usage. Consider these key variables before selecting fabric:
- Sport type: Contact sports like BJJ and MMA require four-way stretch and reinforced stitching. Field sports need breathability and moisture-wicking properties.
- Climate: Australian outdoor training environments demand UPF 50+ rated fabrics to manage sun exposure over long sessions. Learn more about UV protection in training and why it matters for performance gear.
- Usage frequency: Training gear needs to survive daily washing; match-day kits have different durability expectations.
- Layering needs: Indoor combat sports may require compression rashguards under gi tops, while outdoor team sports may layer over base garments.
Here is a quick fabric reference to guide your selection:
| Fabric type | Best use | Key benefit |
|---|---|---|
| 100% polyester | Sublimated match kits | Lightweight, moisture-wicking, dye-receptive |
| Poly-spandex blend | Compression rashguards | Four-way stretch, abrasion resistance |
| Cotton-poly blend | Training tees | Comfort, screen print-friendly |
| Nylon-spandex blend | Grappling shorts, swimwear | Durability, quick-dry |
Pro Tip: Ask your manufacturer for fabric swatch samples before approving base garments. What looks identical on a monitor can feel completely different during a training session.

Designing your custom sportswear kit step by step
Once your assets and requirements are ready, the design process can begin. Taking a structured approach here prevents the most common and expensive mistakes teams make.
-
Decide between a template and a fully custom design. Templates are faster and cheaper, usually taking two to three days to proof. Fully custom designs give you complete creative control but require more communication rounds with your manufacturer. For teams creating their first kit, starting with a template and adding custom colours and logo placement is a practical middle ground.
-
Lock in your colour palette using specific codes. Never describe a colour as "dark blue" or "bright red." Supply Pantone codes or hex values to your manufacturer so the printed result matches your expectations. Colour shifts during sublimation are common when manufacturers work from approximated descriptions rather than exact values.
-
Plan every element that goes on the garment. This includes player names, squad numbers, primary logo, secondary logos, sponsor panels, and any required league patches. Decide early whether names and numbers will be part of the sublimated design or added separately, as this affects both cost and turnaround time.
-
Review digital mockups carefully before approving. A collaborative design process with one to two revision rounds improves satisfaction and reduces errors. Examine colour placement, number legibility at distance, logo scale relative to garment size, and whether seam lines cut through important design elements.
-
Circulate proofs to key stakeholders before final sign-off. Have your team captain and at least one other senior player review the digital mockup. Fresh eyes catch things you miss after staring at a design for hours.
-
Confirm print-ready files before sending to production. Bleed margins, colour profiles (CMYK for print), and file resolution all need to meet the manufacturer's specifications. Sending incorrect files is one of the most avoidable causes of reprints.
Pro Tip: When reviewing a digital mockup, print it at actual garment size on paper and hold it at arm's length. This replicates how the design reads from the sideline or training mat far better than viewing it on screen at 100% zoom.
Printing and decoration methods compared
Understanding the differences between printing methods gives you genuine control over quality, cost, and longevity. Each method suits a specific combination of design complexity, fabric type, and expected wear conditions.
Sublimation printing
Sublimation embeds dye directly into polyester fabric fibres using heat and pressure. The result is a print that does not sit on top of the fabric. It cannot crack, peel, or fade in the same way surface prints do. This method is ideal for full-colour, gradient-heavy designs and is the preferred choice for professional-grade team kits. The trade-off is that it only works on white or light-coloured polyester base fabrics. Dark fabric options are limited.
Screen printing
Screen printing layers ink on top of the fabric surface and works well on cotton-poly blends. It suits bold, limited-colour designs like a simple club crest or sponsor logo. The upside is cost effectiveness for large, simple print runs. The downside is that the ink sits on the surface, meaning it is more vulnerable to cracking and fading over time, particularly on synthetic fabrics. Screen printing is less suitable for detailed gradients or photographs.
Direct to Film (DTF)
DTF printing transfers a design from a film sheet to the garment using heat. It has no minimum order quantity, making it useful for mid-season additions or individual replacement pieces. Digital printing methods like DTF allow fast turnaround and on-demand production for smaller or complex orders, which makes them particularly useful when you need to add a late roster signing without reordering the entire kit.
Here is a direct comparison to guide your decision:
| Method | Best for | Fabric compatibility | Durability | Cost (per unit) | Turnaround |
|---|---|---|---|---|---|
| Sublimation | Complex full-colour designs | Polyester only | Very high | Medium to high | 3 to 4 weeks |
| Screen printing | Bold, simple logos | Cotton, poly blends | Medium | Low to medium | 7 to 10 days |
| DTF | Small runs, replacements | Most fabrics | Medium to high | Medium | 5 to 10 days |
| Heat transfer vinyl | Names, numbers, simple shapes | Most fabrics | Medium | Low | 3 to 5 days |
Sublimation is the preferred method for sport teams wanting professional-grade, vibrant, and durable uniforms, particularly when the kit will see regular training and competition use over a full season.
Collecting accurate sizes from your team
Sizing errors are the single most common cause of delays and additional costs in custom kit orders. Most of those delays stem from roster collection issues that could be avoided with a structured collection process.
Use these practices to get it right the first time:
- Create a digital form using Google Forms or a similar tool. Include dropdown menus for size selection rather than free-text fields, which produce inconsistent entries. Collect player name, preferred number, shirt size, and shorts size in a single submission. Using a structured form with clear deadlines and follow-ups significantly improves compliance rates.
- Run a sample try-on session. Ask your manufacturer for a set of size samples before finalising your order. This is particularly useful for youth teams and sports that involve layering. Sport-specific sizing varies, and grappling or martial arts kits often size differently from standard athletic wear. You can also check sizing and fitting advice for combat sports garments specifically.
- Order extra units in the most common sizes. Industry standard practice is to add two to three extra jerseys in the sizes your roster uses most, specifically to cover mid-season player additions without triggering a full reorder.
- Set a non-negotiable submission deadline. Allow yourself at least one week between the deadline and your planned order date to chase any outstanding responses and make corrections.
- Account for layering in martial arts and contact sports. A player who wears a medium in a standard tee may need a large rashguard if they are wearing it under a gi top or competition jersey.
Pro Tip: Send the size collection form with a photo showing how to measure chest, waist, and hip correctly. Players who guess at their measurements produce the most errors. A 30-second measurement guide cuts your correction rate significantly.
Managing production timelines and delivery
Understanding realistic timelines lets you plan backwards from your season start date and avoid the most avoidable cost in custom kit orders: rush fees.
Follow this sequence to keep your order on track:
-
Set your season start date and work backwards. Allow a minimum of six weeks from order placement to match-day delivery. Ordering four to six weeks ahead gives standard production methods enough lead time without incurring surcharges.
-
Factor in design revision time. Each revision round adds one to three business days to your proof approval process. Build two rounds of revisions into your schedule from the start, rather than hoping the first proof is perfect.
-
Understand production time by method. Standard production for sublimated jerseys is ten to fourteen business days, with screen printing at seven to ten days. Rush options can reduce this to three to seven business days, but carry surcharges of fifteen to thirty per cent.
-
Confirm shipping transit times with your manufacturer. Add at least five business days for domestic freight in Australia, and longer for regional or remote locations.
-
Inspect the order on receipt. Check every garment against the approved proof before distributing to players. Note any discrepancies in writing to the manufacturer immediately.
-
Keep your reorder process ready. For mid-season additions, DTF printing is often the fastest option since it carries no minimum order quantity and can turn around in five to ten days.
Key communication tips to keep production moving:
- Respond to manufacturer queries within 24 hours to avoid falling back in their production queue.
- Nominate a single point of contact on your end to prevent conflicting instructions.
- Confirm proof approval in writing, not via verbal agreement or phone call.
My take on what actually makes or breaks a custom kit
I have worked through enough custom kit orders to know that the technical decisions matter far less than the process decisions. Coaches spend days debating sublimation versus screen printing, and then hand their manufacturer a JPEG logo at 72 DPI. That one file quality issue will cost more time than any other choice they make.
The sizing collection process is where most orders quietly unravel. I have seen teams arrive at a season opener with three jerseys that do not fit and a squad furious about it. The fix is almost always the same: a structured digital form, a firm deadline, and a brief try-on session. None of this is complicated, but it does require someone to own the process rather than assume it will sort itself out.
On the printing method question, I lean toward sublimation for any team that plans to use their kit for more than one season. The upfront cost is higher, but the durability means you will not be reordering cracked logos by round six. For clubs on tighter budgets ordering simple designs, screen printing is a sensible short-term option, but go in knowing it has a shorter lifespan on polyester fabrics.
Clear, written communication with your manufacturer cuts production time more reliably than any other single factor. Approve proofs quickly, respond to queries same-day, and nominate one decision-maker on your end. I have seen that alone shave two weeks off a standard timeline.
The kits your players wear shape how they carry themselves on the mat and on the field. Getting the process right is worth the extra preparation time.
— ZZA
Build your team's kit with Combatra
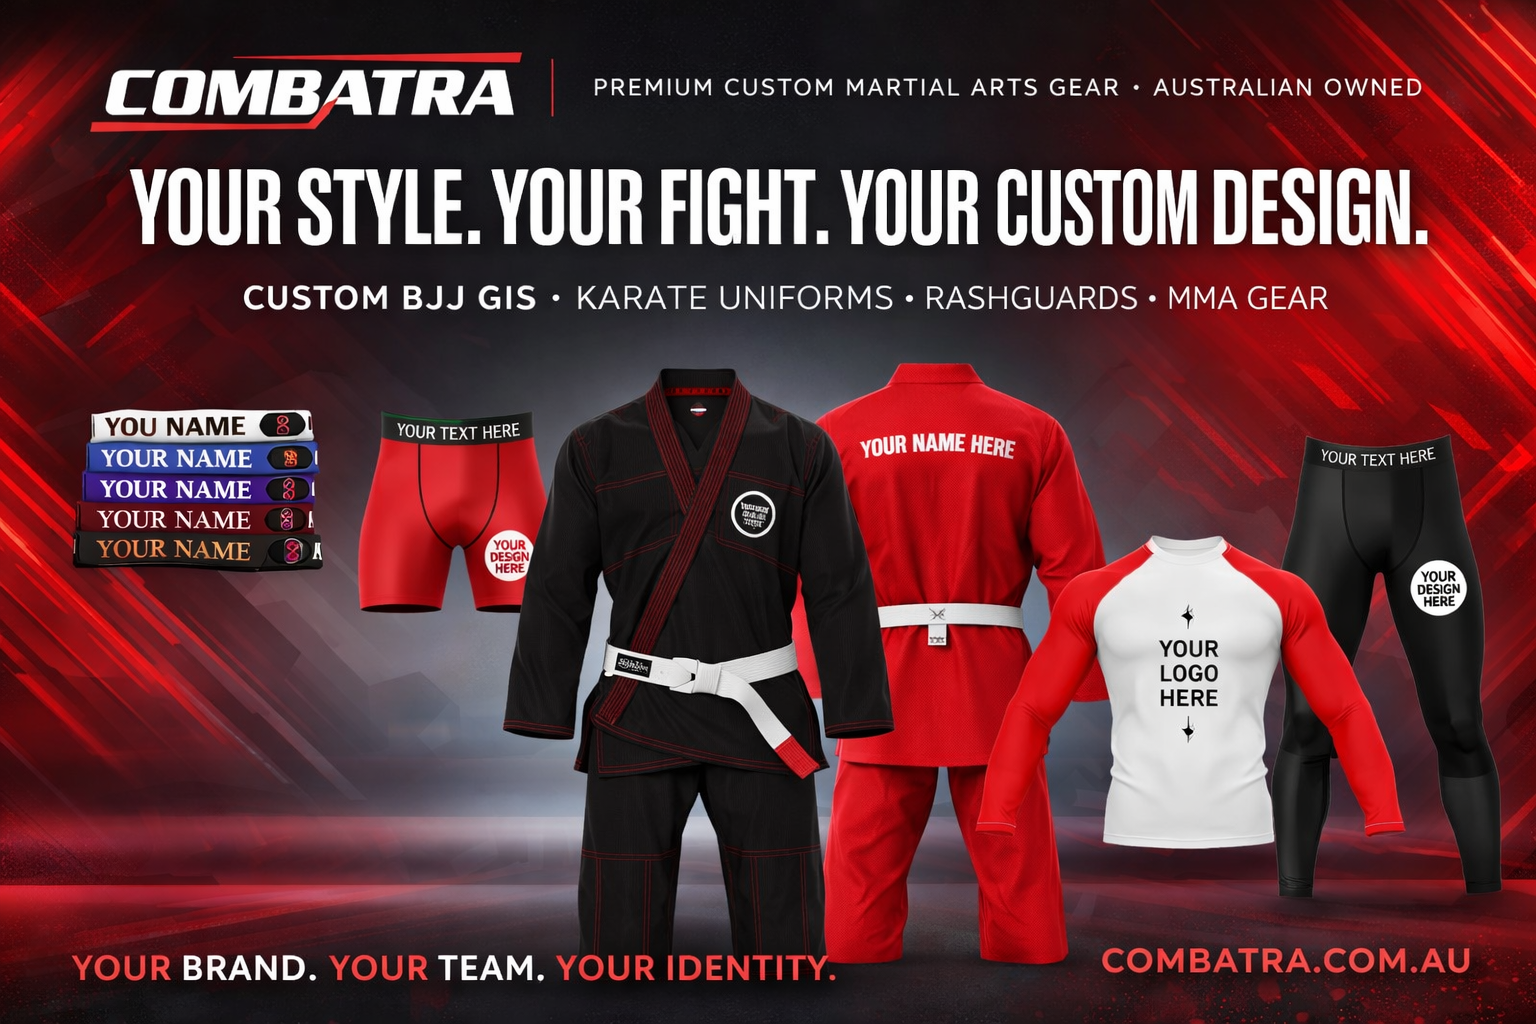
Combatra specialises in custom rashguards and team kits designed for combat sports athletes and outdoor training environments across Australia. Every garment is built for real training loads, with UPF 50+ sun protection, four-way stretch fabric, and compression fit tested against Australian standards. Whether you are outfitting a BJJ academy, a karate dojo, or an MMA team, Combatra offers full design support, including name and logo personalisation with your colours. The customisable MMA fight shorts and compression rashguard range are particularly well-suited to teams building a cohesive kit for both training and competition. Combatra also supports mid-season additions, so your kit process does not stop at round one.
FAQ
How long does it take to produce a custom team kit?
Standard production for sublimated jerseys runs ten to fourteen business days, with screen printing at seven to ten days. Add design revision and shipping time and you should allow at least six weeks from order placement to delivery.
What is the minimum number of garments I need to order?
Common minimum order quantities start at six pieces. Orders below this threshold may incur higher per-unit costs or limit your decoration method choices.
Which printing method is best for sports team kits?
Sublimation is the preferred method for professional-grade team kits because the dye bonds directly with polyester fibres, making it resistant to cracking, peeling, and fading through heavy use. For simple designs on cotton blends, screen printing is a cost-effective alternative.
How do I collect sizes from my players without errors?
Using a digital form with dropdown size selections, a firm submission deadline, and a sample try-on session significantly reduces sizing errors and last-minute change requests.
What file format should I supply for my team logo?
Supply your logo as a vector file (.AI or .EPS) or as a PNG at 300 DPI minimum. Low-resolution artwork forces manufacturers to rebuild the file from scratch, adding two to three business days to your proof approval timeline.